Tuesday, February 4, 2014

Project Run & Play Week 4 - Signature Style

This is sort of a resolution of what my style will/should be, moving forward. 
I want to really focus on creating some great solid, timeless patterns that can be used as they are, or can be a base for whatever embellishment works for a certain occasion.
So this is my first piece drafted with that goal in mind.
(Static electricity and a snotty nose were against us today, but we persevered)


The details of the design;

- fully lined

- boat neck

- 3/4 length sleeves

- knee length

- a-line skirt

- and it's in a lightweight knit, as I'm sure you could tell :)


I also added three rows of ruffles, beginning just below the waist (see - first embellishment). I didn't hem the ruffles since the knit doesn't fray.


I've also used this pattern to make some shirts for Pooka and am planning lots more dresses too.


I'm really pleased with the fit; fitted, but not tight, shoulder seams hit at the shoulder and although the neckline is relatively high, it still pulls on over her head easily.

SHE loves it because it's super comfy for running & jumping & climbing.


I made her leg warmers too - she has about ten pairs and loves them.

The scarf, I knit for myself and we just threw it on for a few pics. 


If you haven't already done so, head over now to vote for the three incredible finalists in Project Run & Play!


Now I'm off to sew and craft my heart out for a certain someone's upcoming 3rd birthday!


Tuesday, January 28, 2014

Project Run & Play Week 3 - The Repurposing Challenge

Wow - it's week 3 already!!

I missed week 2 which was the "Let's Go To The Movies" week. There was just too much other sewing to be done - birthdays and baby showers, so rather than halfa$$ an outfit, I decided to sit it out.

Anywho, I'm a huge fan of repurposing/upcycling so this is one of my favorite challenges to sew along with.
So here's what I came up with.


I wore this shirt allll summer when pregnant with Pooka. And actually, I wore it plenty the following summer too! So it has been thoroughly exhausted as a shirt - the shirring at the neck has gotten super loose so it wasn't even wearable anymore. What a perfect candidate for a refashion!

Things I love about the shirt;
- the vibrant colour
- it's 100% cotton and very, very lightweight
- the openwork on the sleeves

OK, so I wanted to incorporate the sleeve edging for sure, and I had a theory (untested until last night!) that the shape of these sleeves - it's basically a peasant style - would be the right shape for shorts legs. I'm sure I'm not the first (could be the last) to discover this, but I was so thrilled when I cut the sleeves off right at the seams and, sure enough, the shaping was PERFECT! They even have a higher rise at the back! Happy dance!

I felt that the detail now on the shorts was enough so kept the top simple. I actually used the Popover Sundress free pattern from Oliver + S, cutting it a little below Pooka's waist, gathered it slightly to fit the shorts waist and attached them.


The last thing I did was to zig zag some quarter inch elastic onto the inside seam at the waist. 

The polka dot fabric was a small scrap from my stash - because everything's better with polka dots! 


We had a fast and fun photoshoot - and got lots of silly pics! Here are a couple.


So, if you haven't voted for the contestants, head over there  now and see the beautiful work!

Tuesday, January 14, 2014

Project Run & Play Season 8

Theme: Winter Wonderland

Another season of Project Run & Play has begun! So fun. Although I haven't been managing to blog much (or at all), I HAVE been sewing and crafting a lot. But this is good motivation to get the blogging going again.

So, Winter Wonderland. Hmm. I wish I had had this little outfit finished a week ago, when we had a ton of snow and ice here in NY - that would have made for pretty Wonderland pictures. But, instead, I finished the binding just this morning, on a rainy, miserable day and we're stuck taking badly lit, indoor pics. But hopefully they're clear enough to show the outfit well.


I've had this sparkly Paris fabric sitting here for months, wondering what to do with just a smidge under a yard of it. And a few weeks ago, I picked up almost a yard of the grey/silver chevron from the remnants bin at Joann's.
It turned out I had just enough to make the Party Dress free pattern from A Cottage Home!

I used the bodice pieces for size 4, and made the skirt the length of fabric I had left, which ended up being perfect with the band of chevron added at the bottom. I also added pockets to the side seams (a big hit with Pooka!)


Then, for the little bolero, I used some scraps of anti-pill fleece and traced a shirt that fits a little loosely. I had ONE Eiffel Tower left intact, so appliquéed it onto one sleeve of the bolero to "tie them together". Finally I used a pretty satin bias binding to finish the bolero, extending it to create ties, and finished the armholes of the dress in the same.

I love how this outfit turned out and can't wait for her to wear it


Sunday, October 20, 2013

The Littlest Fishie

A Simple Baby Costume

Hey there!

So this is my first tutorial - hopefully clear enough and easy to follow. (Be warned - there are a LOT of pictures).

Also, some of the pics may not be super clear, sorry. My camera charger has run away.

OK, let's get to it!

My friend, Lindsay, just gave birth to a beautiful baby girl a month ago and was having trouble finding a small enough costume for her little squish. So I came up with this!


I just love how it turned out. And it's fleece so she'll be cozy warm.

Want to make one? Here's how i did it.

First, I dug out a 3 month shirt from the Pooka's baby things to check aize. Then, I just freehanded a basic shape for the body. I cut two the same - front and back. (See a couple of chunks missing at the side, there? Yup, using scraps. )

I cut the shoulders longer on the back so that they could fold over and snap closed.

Next, I cut some orange fleece stripes (craftily covering those missing chunks) and stitched them onto the body, close as possible to the edge.
Make sure the front and back stripes are positioned as evenly as possible.

I then cut some 2 inch wide strips from the end of a black t-shirt and ironed them in half to make some binding. This covered all the raw edges :-).
In the pic above you can see how I attached the binding. I lined up the raw edges of my folded binding with the line of stitching on the orange stripe. 
Then I sewed the binding on at just the width of the presser foot. You want it to be just outside the edge of the orange stripe.

Once you've attached black binding to all the stripe edges, flip the folded edge of the binding onto the orange stripes and topstitch it down. 
Now it's starting to look cool, right?


Ok, next, every fishie needs a tail, right?
So I googled pictures of Nemo - because that's what this lil fishie is looking like. Got the shape of the tail, and cut two layers of orange fleece for the tail.
Then I stitched the two layers together around the edges, right sides together, turned it right side out, and stitched some black lines into it.


Cute? I think so!

Now, center the tail on the bottom of one of the body pieces, like below.


Then we put the other body piece on top of this, right side down, and pin around the edges. This is the time to make sure your stripes are lining up - fleece is fairly easy to smoosh or stretch a little if you need to.


Now, use some more t-shirt binding to finish the raw edges at the armholes and neck. You can do this all in one continuous strip. 
I lined up the raw edges of my folded binding with the raw edge of the fishie, on the WRONG side of the costume and stitched it on about a quarter inch from the edge.


Then, I trimmed off the edges, as close to the stitching as possible, to reduce the bulk. And then flip the folded edge of the binding to the right side and topstitch it down.

All that's left is to add some cute snaps. Or, if you prefer to add buttons, that would be cute too - though I'd add the buttonholes before doing the binding.


And there you have it - cute, cozy and not too difficult.
Pooka had to "help" with this pic!

But then,
I couldn't leave it at that.
What about that tiny noggin - Halloween in NY has a habit of being chilly.

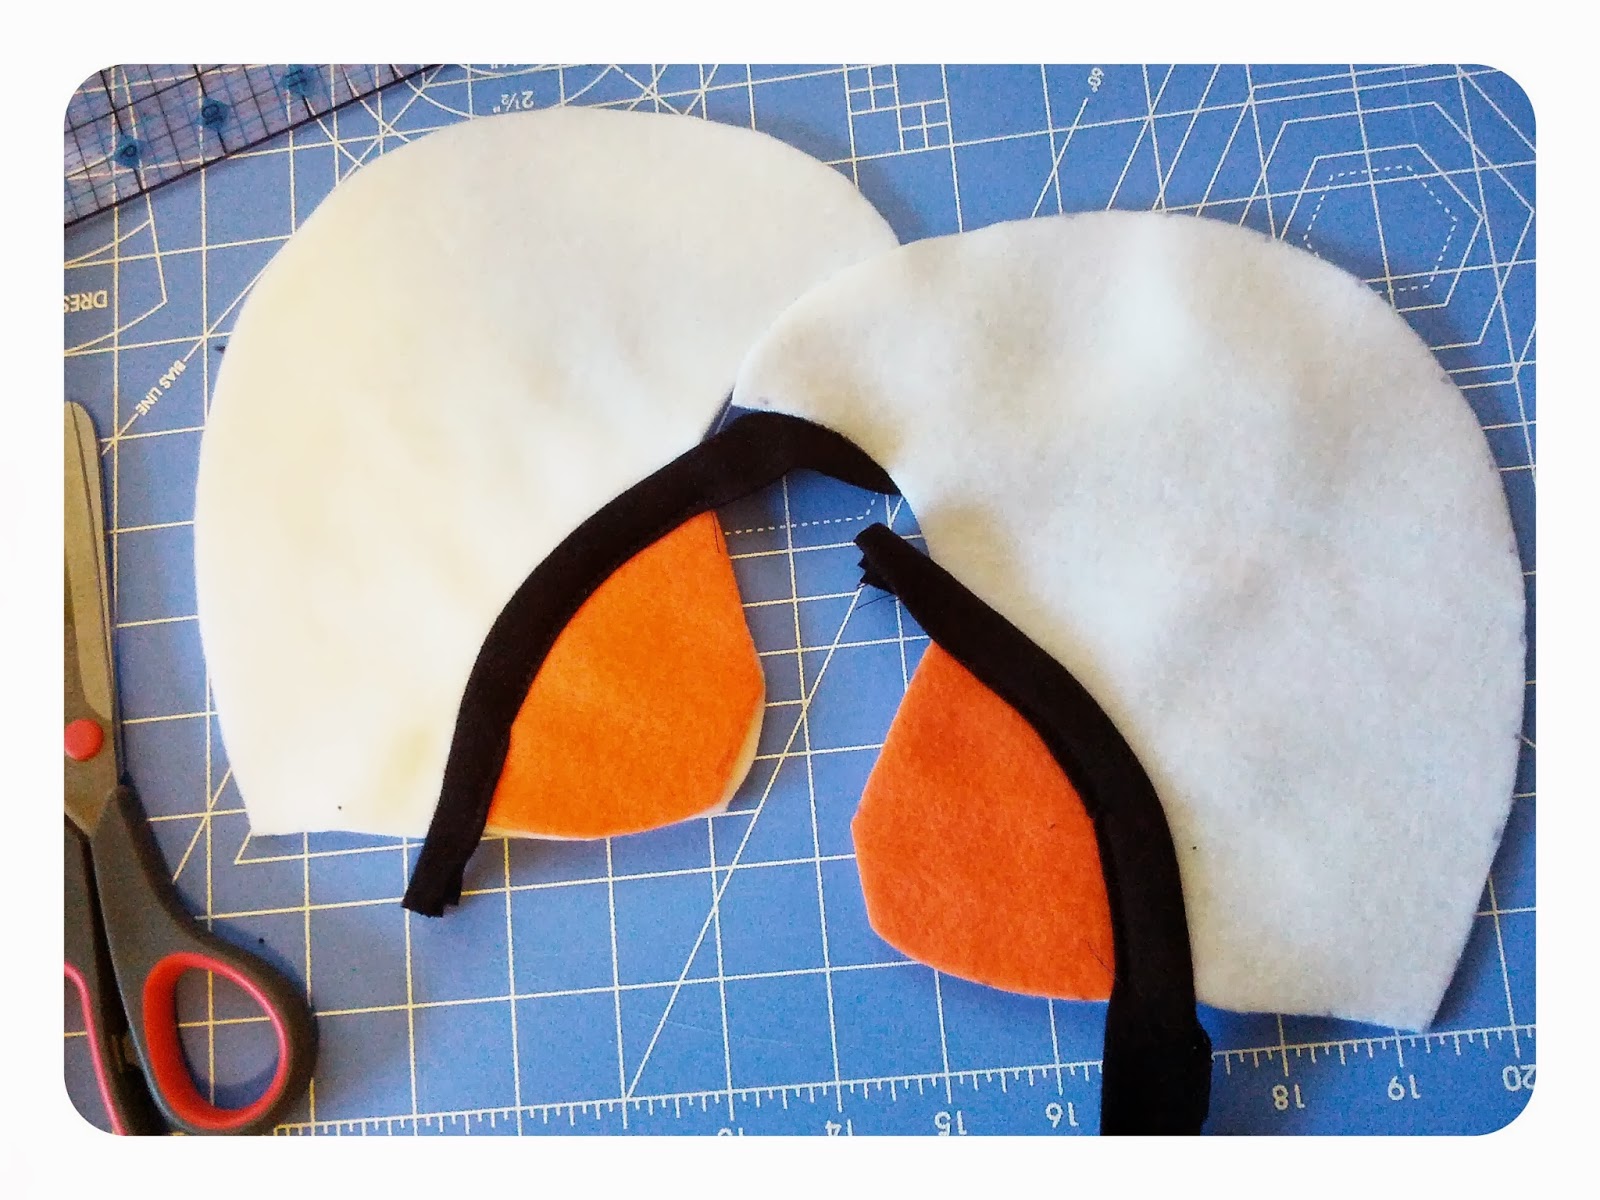
I couldn't find any tiny baby hats in the house so I really just winged the size and shape of this. Plus, I only had a TINY amount of orange fleece left - otherwise I'd have done a bigger stripe of orange on the hat.


You can see from the quilting mat, it's about 8 inches in both directions, at the longest/widest part.
Cut 2 of these.

Then, from my tiny scraps of orange, I cut a double layer of fin for the top of the head, again googling to find roughly the right shape.


And just like we did for the tail, I sewed it right sides together, except for the bottom edge, turned it right side out, and stitched some black lines for a little definition, and to help it stand up.


Then I used my very last orange scraps to add these patches at the ear area (because that was the only place to fit such little bits) and added the binding just as I did for the stripes on the body.


Then, I pinned the fin between the hat pieces, raw edges and right sides together, and sewed it together. It's not all the way pinned above, but I just eased the raw edges together as I sewed.


Heehee, so tiny and cute!
At this point, I trimmed that point off the front forehead area.

And lastly, I added more t-shirt binding all around the edge. 
I did it just like before on the costume armholes and neck - first sewing it on raw edges together to the inside of the hat.


Again, trim everything close to the stitching to reduce bulk and make it easier to turn.
Then flip the binding to the right side, topstitch all around and you're done!


Now, I just have to wait for pics of the little squish in her fishie costume. 
Here it is all together.


Pretty simple and cute, no? 
I'd love to hear what you think, and if you have questions I'm happy to answer them :-).

Have a great day!


Tuesday, October 1, 2013

The Infinity Collection

It's the fourth and final week of Season 7 over at Project Run & Play (here)
I have had a blast sewing along with the various themes each week. And I've been inspired and amazed by the incredible talent and creativity of both the contestants and the sew-alongers (yes it IS a word!!)

The theme for the grand finalé is "Your Signature Style".

I had to think about this one for a long while! It sounded so simple - pretty much free reign to make anything you want. But I wanted the outfit to capture all of these things:

versatile, comfortable, functional, of course cute, different, clean lines aaaaand some ruffly goodness :-).

After staring at my pile of chosen fabrics for a looong time, waiting for inspiration, it finally came together on my mind. And here it is - The Infinity Collection!


I chose the title because, even though the outfit is only 3 pieces, it yields an (almost) infinite number of combinations and different looks. Yay.

So, to the details;

The three pieces are
 1) a long sleeved dress, the top in knit (eggplant on one side and white on the reverse) and the skirt knit from variegated ruffle yarn. (This yarn is more commonly used in scarves but I'm a rebel).
 2)an infinity top (no closures - I love this style of top) which is buffalo plaid on one side and flannel on the reverse. This top is bound in the plaid and has a high-low hem - higher in front and lower in the bank panels, which means they stay closed nicely.
 3)simple reversible leggings made in the same fabrics as the dress - one side eggplant and one side white.


I drafted all the patterns myself :-)


This little collection is going to get lots of wear - it's all super cosy because of the double layers, so perfect for the chilly weather which will soon be upon us here in NY!


Thanks for stopping by!